2.5D
Stack flat shapes into a 2.5D view, oblique or isometric, solid or pulled apart.
2.5D turns flat shapes into a quick 3D-looking drawing. Each shape becomes one layer of a stack, drawn as thick as its material and pushed back along a depth direction, so a few rectangles become a box, a step or an exploded assembly. Nothing is modelled: the stack is redrawn from your shapes whenever they change, so editing a shape edits the 2.5D view too.
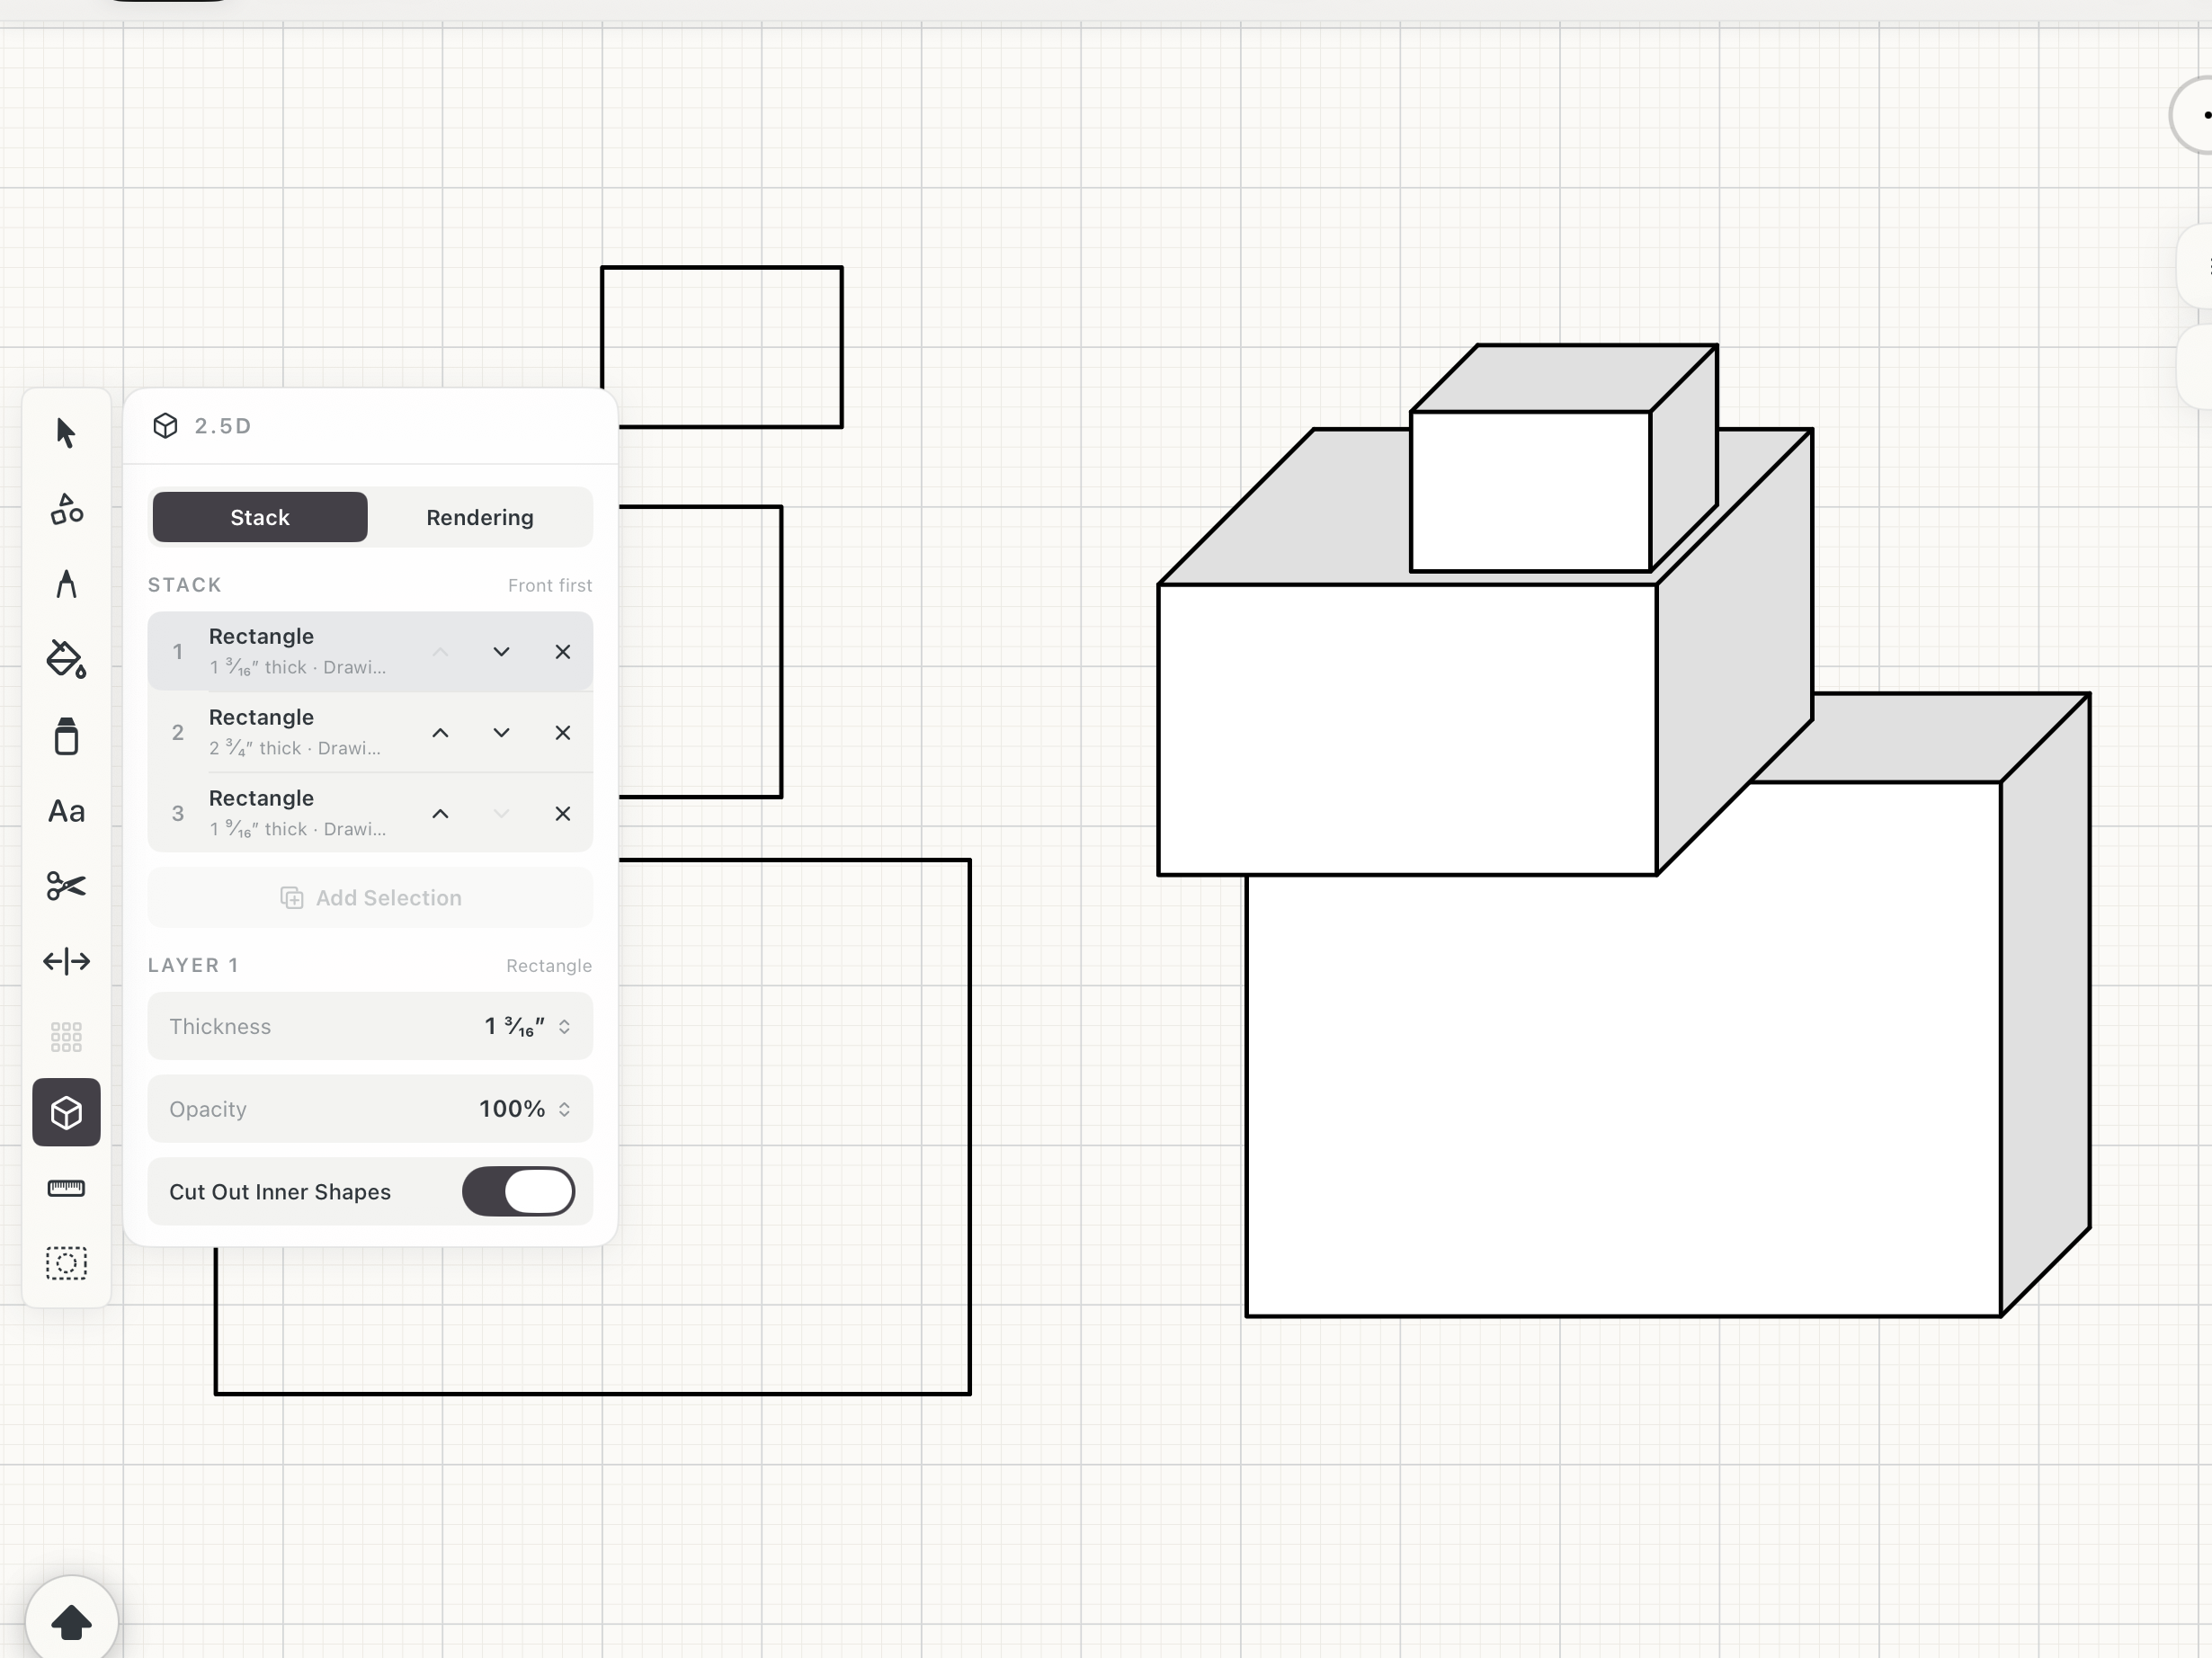 Three rectangles, left, and the stack 2.5D makes from them
How to use
- Draw the shapes that make up your object: one shape, or one group, for each layer.
- Give each a thickness: in Parts, or later with the layer's Thickness in the panel.
- Select them all and tap 2.5D on the tool rail. The stack appears beside them, on a layer of its own, with the 2.5D panel open.
- Change the stack on the Stack tab and how it's drawn on the Rendering tab.
- To come back to a stack later, double-tap its drawing.
Stack
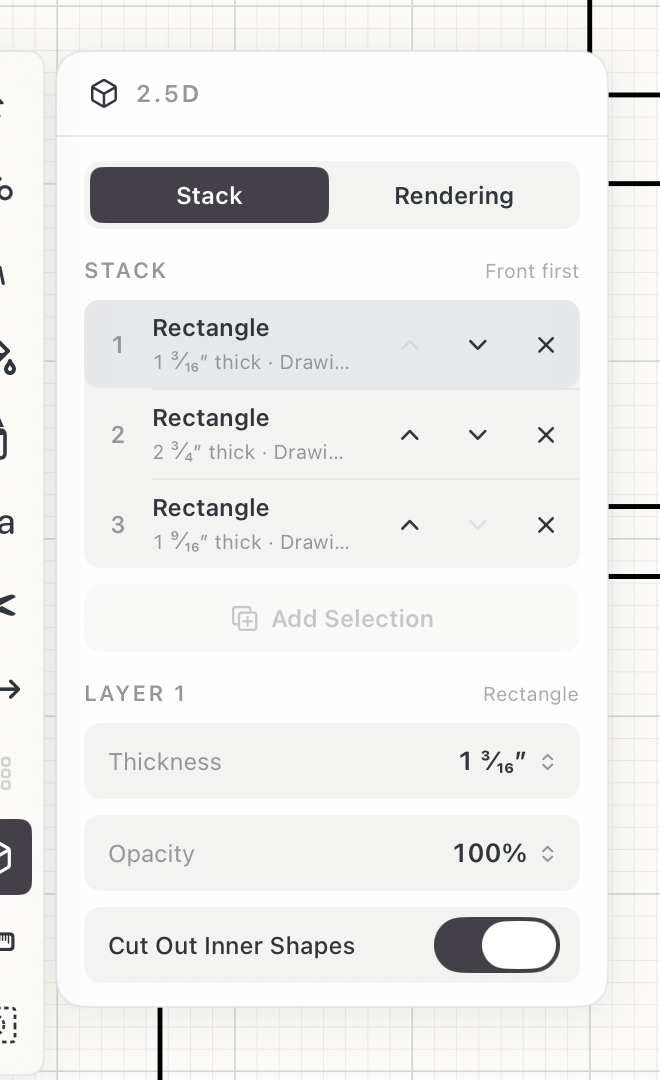
Stack and Rendering
The panel's two tabs: what the stack is made of, and how it's drawn.
Layers
Every layer of the stack, front first. The front layer draws over the ones behind it. Tap one to change its settings below.
Order and remove
Move a layer forward or back in the stack, or take it out. Taking it out leaves the shape itself alone.
Add Selection
Select more shapes on the canvas and tap this to add them to the back of the stack.
Thickness
How thick the selected layer is: the material's real thickness, the same number the Parts list uses. Orange Set means it has none yet.
Opacity
How solid the layer's faces are. Lower it to see the layers behind.
Cut Out Inner Shapes
Treats shapes drawn inside another as holes through it when in a group, so a frame comes out as a frame and not a solid slab. (Draw a rectangle and put a shape "inside it", group them, and add to the stack.)
Rendering
Projection
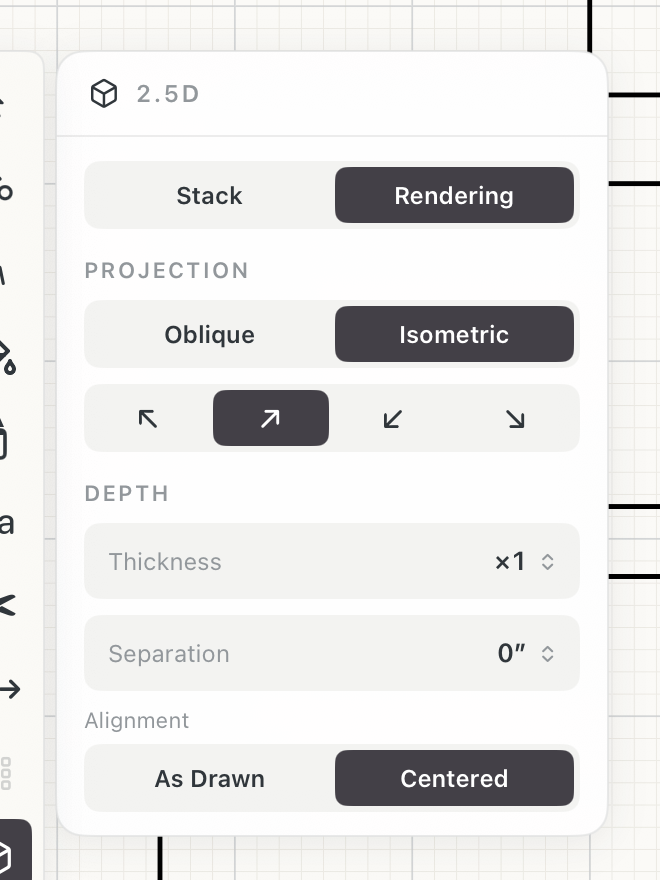
Oblique keeps each face its true shape and pushes depth back at 45°, so the face you drew stays measurable. Isometric turns the faces into the 30° planes of a classic isometric drawing.
Depth direction
Which way the depth goes: up left, up right, down left or down right. Pick the one that shows the sides you want to see.
Thickness
Draws every layer this many times its real thickness. Thin stock like ¾″ plywood all but disappears next to a 4′ panel; turning this up makes it readable.
Separation
The gap between layers. Above zero, the stack pulls apart into an exploded view. Drag the value, or tap to type it.
Alignment
As Drawn stacks the layers where they sit in your drawing. Centered lines up their centres, so different sizes sit squarely on each other. Lets you draw each "layer" side by side on your canvas and have the 2.5D render line them up to visualize it.
See it in use
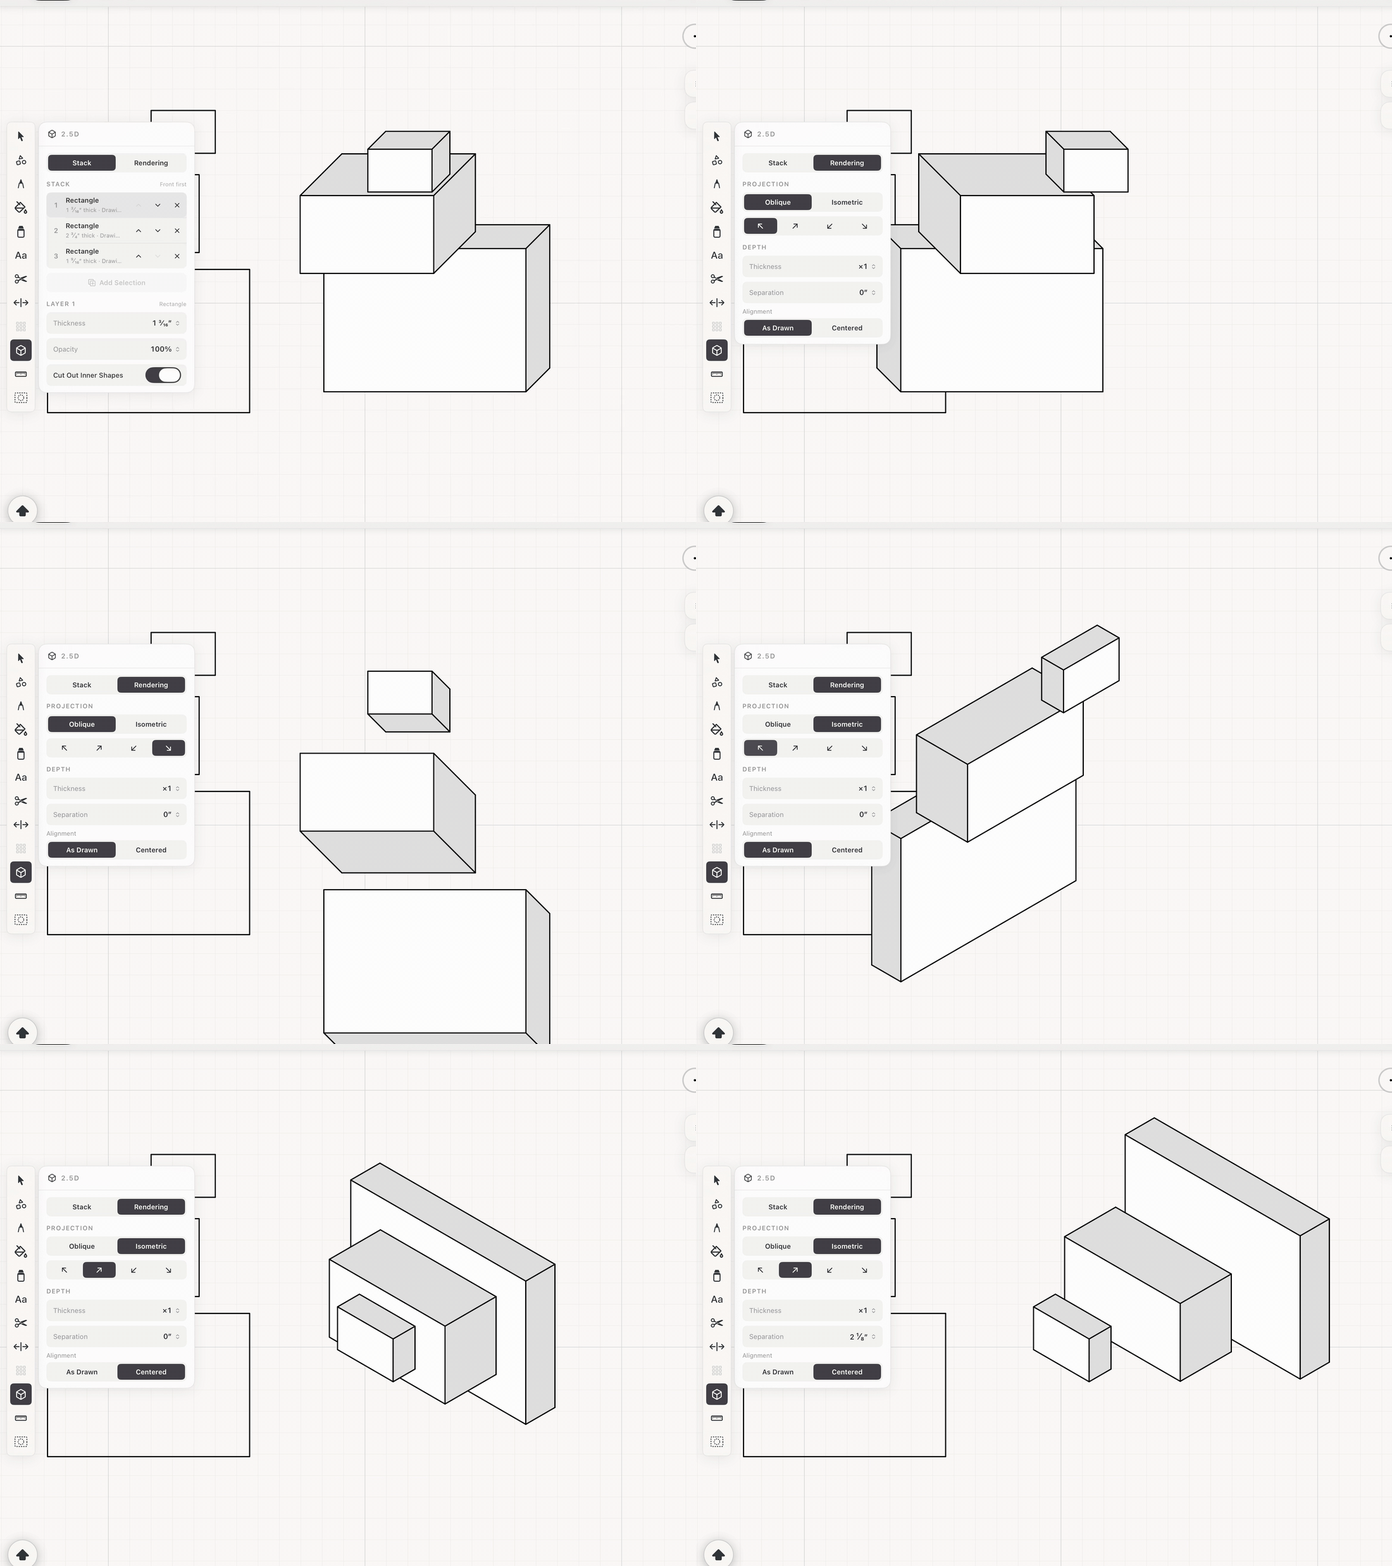
The depth turned each way, then Isometric, Centered, and pulled apart into an exploded view.
Tips
- Draw each part as it looks face-on. 2.5D only adds depth; the face is exactly what you drew.
- For an exploded assembly drawing, set Separation and leave Thickness at ×1 so each part stays its true thickness.
- The stack can be moved, copied and sent to Plan like any drawing.