Images and scale
Trace over a photo, scan, or plan at a known real-world scale.
Bring a photo, a scan or an old plan into Space, then mark a length you know on it. From then on the image is true to size, and anything you trace over it measures correctly.
Bring an image in
- Choose Import › Image... in the top bar, drag an image onto the drawing, or paste one. Space puts each image on a reference layer of its own.
- Photos taken in Field Notes on iPhone arrive in the note already, with whatever scale they were given there.
Open Set Scale
Select the image and tap Set Scale, the ruler on the quick tools bar. Or tap the label under the image.
Every photo carries a small label under it that says how it's scaled:
- Scale not set, in orange: nobody has marked a length on it yet.
- ≈ Scaled by camera: Field Notes' guided camera estimated the scale from how far away the surface was. Close, but mark a length to be sure.
- A length, such as 36″: the known distance it was scaled from. The reference line is drawn over the photo while it's selected.
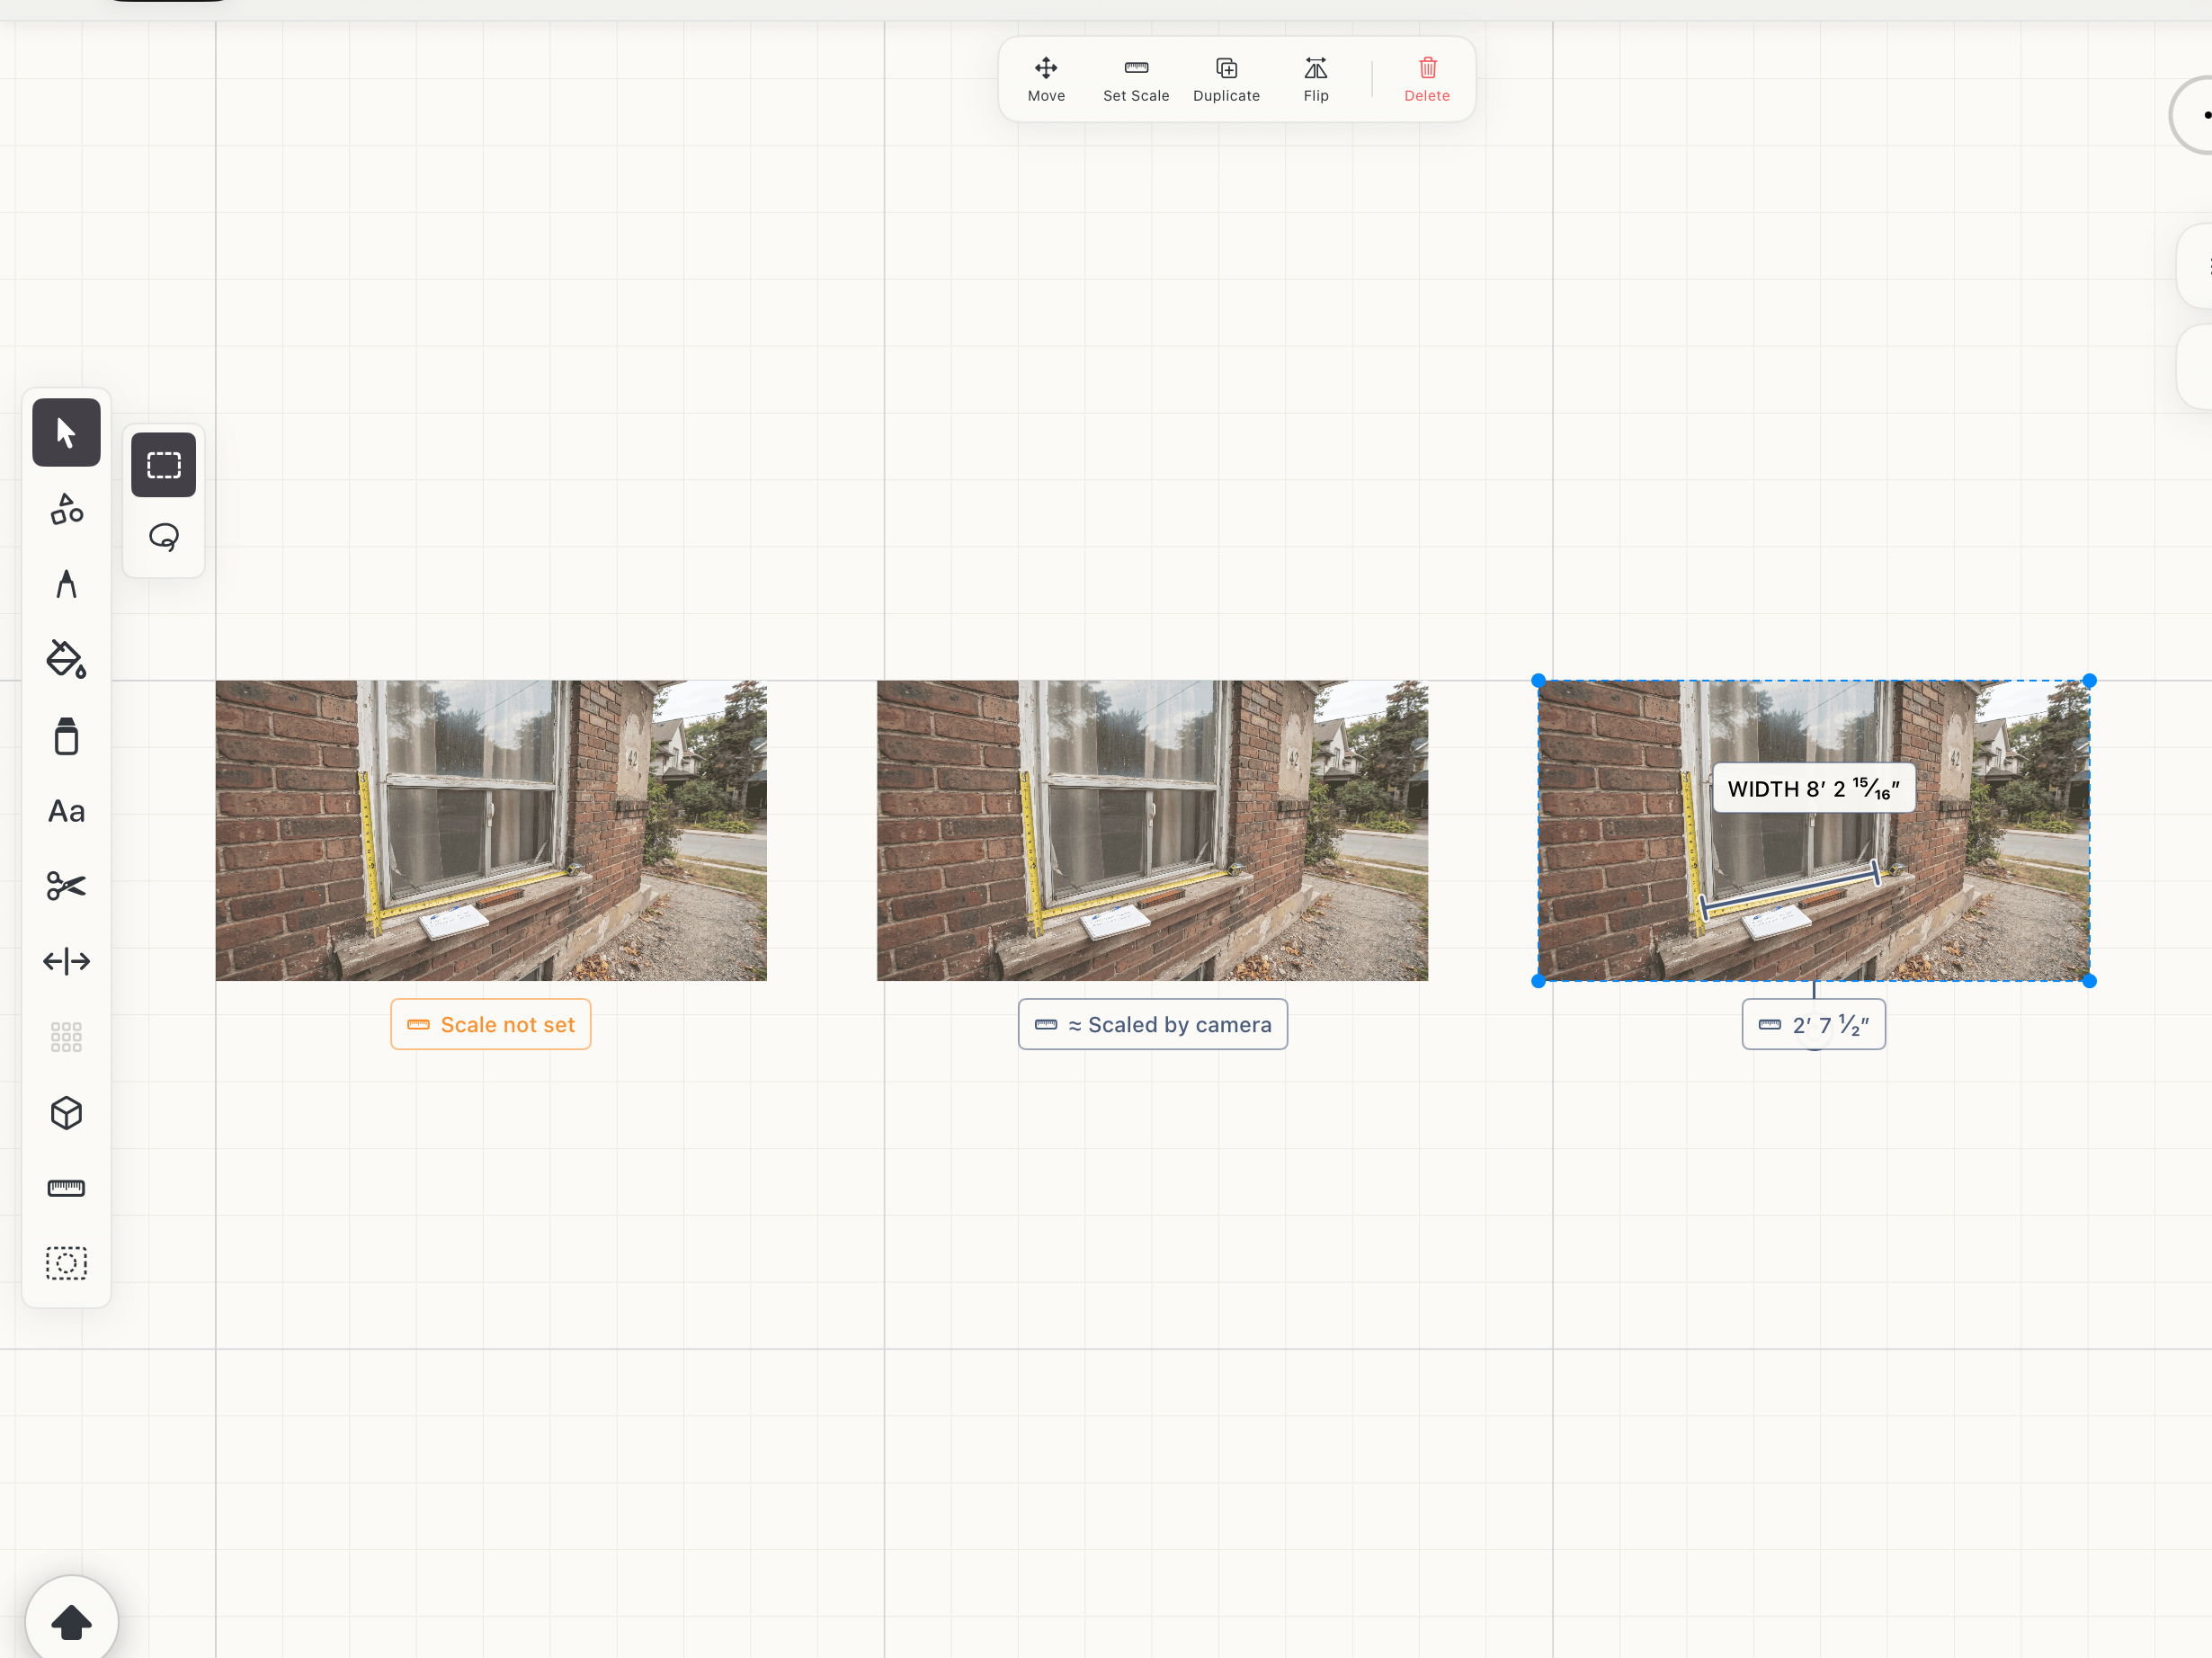 Scale not set, scaled by the camera, and scaled from a known length
The Image Scale panel
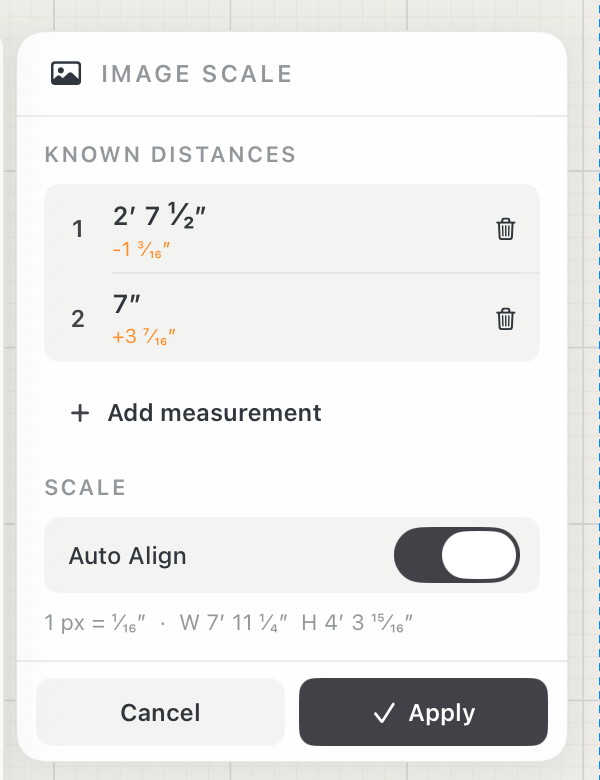
Known distances
Each numbered line is a length you know, drawn over the image. Tap its value to type the real length. With two or more, each shows how far it disagrees with the others; a disagreement over half a millimetre turns orange, which usually means one end is in the wrong place.
Remove
Deletes that line. The last one can't be removed.
Add measurement
Adds another known distance. More lines, spread across the image, average out the error in any one of them.
Auto Align
Rotates the image so that horizontal and vertical lines you've marked come out square to the grid. Handy for a scan or photo taken slightly crooked.
Scale
What the lines work out to: how much one pixel stands for, and the image's real width and height.
Cancel and Apply
Apply scales the image and closes the panel. It stays dimmed until at least one length is set.
On the canvas
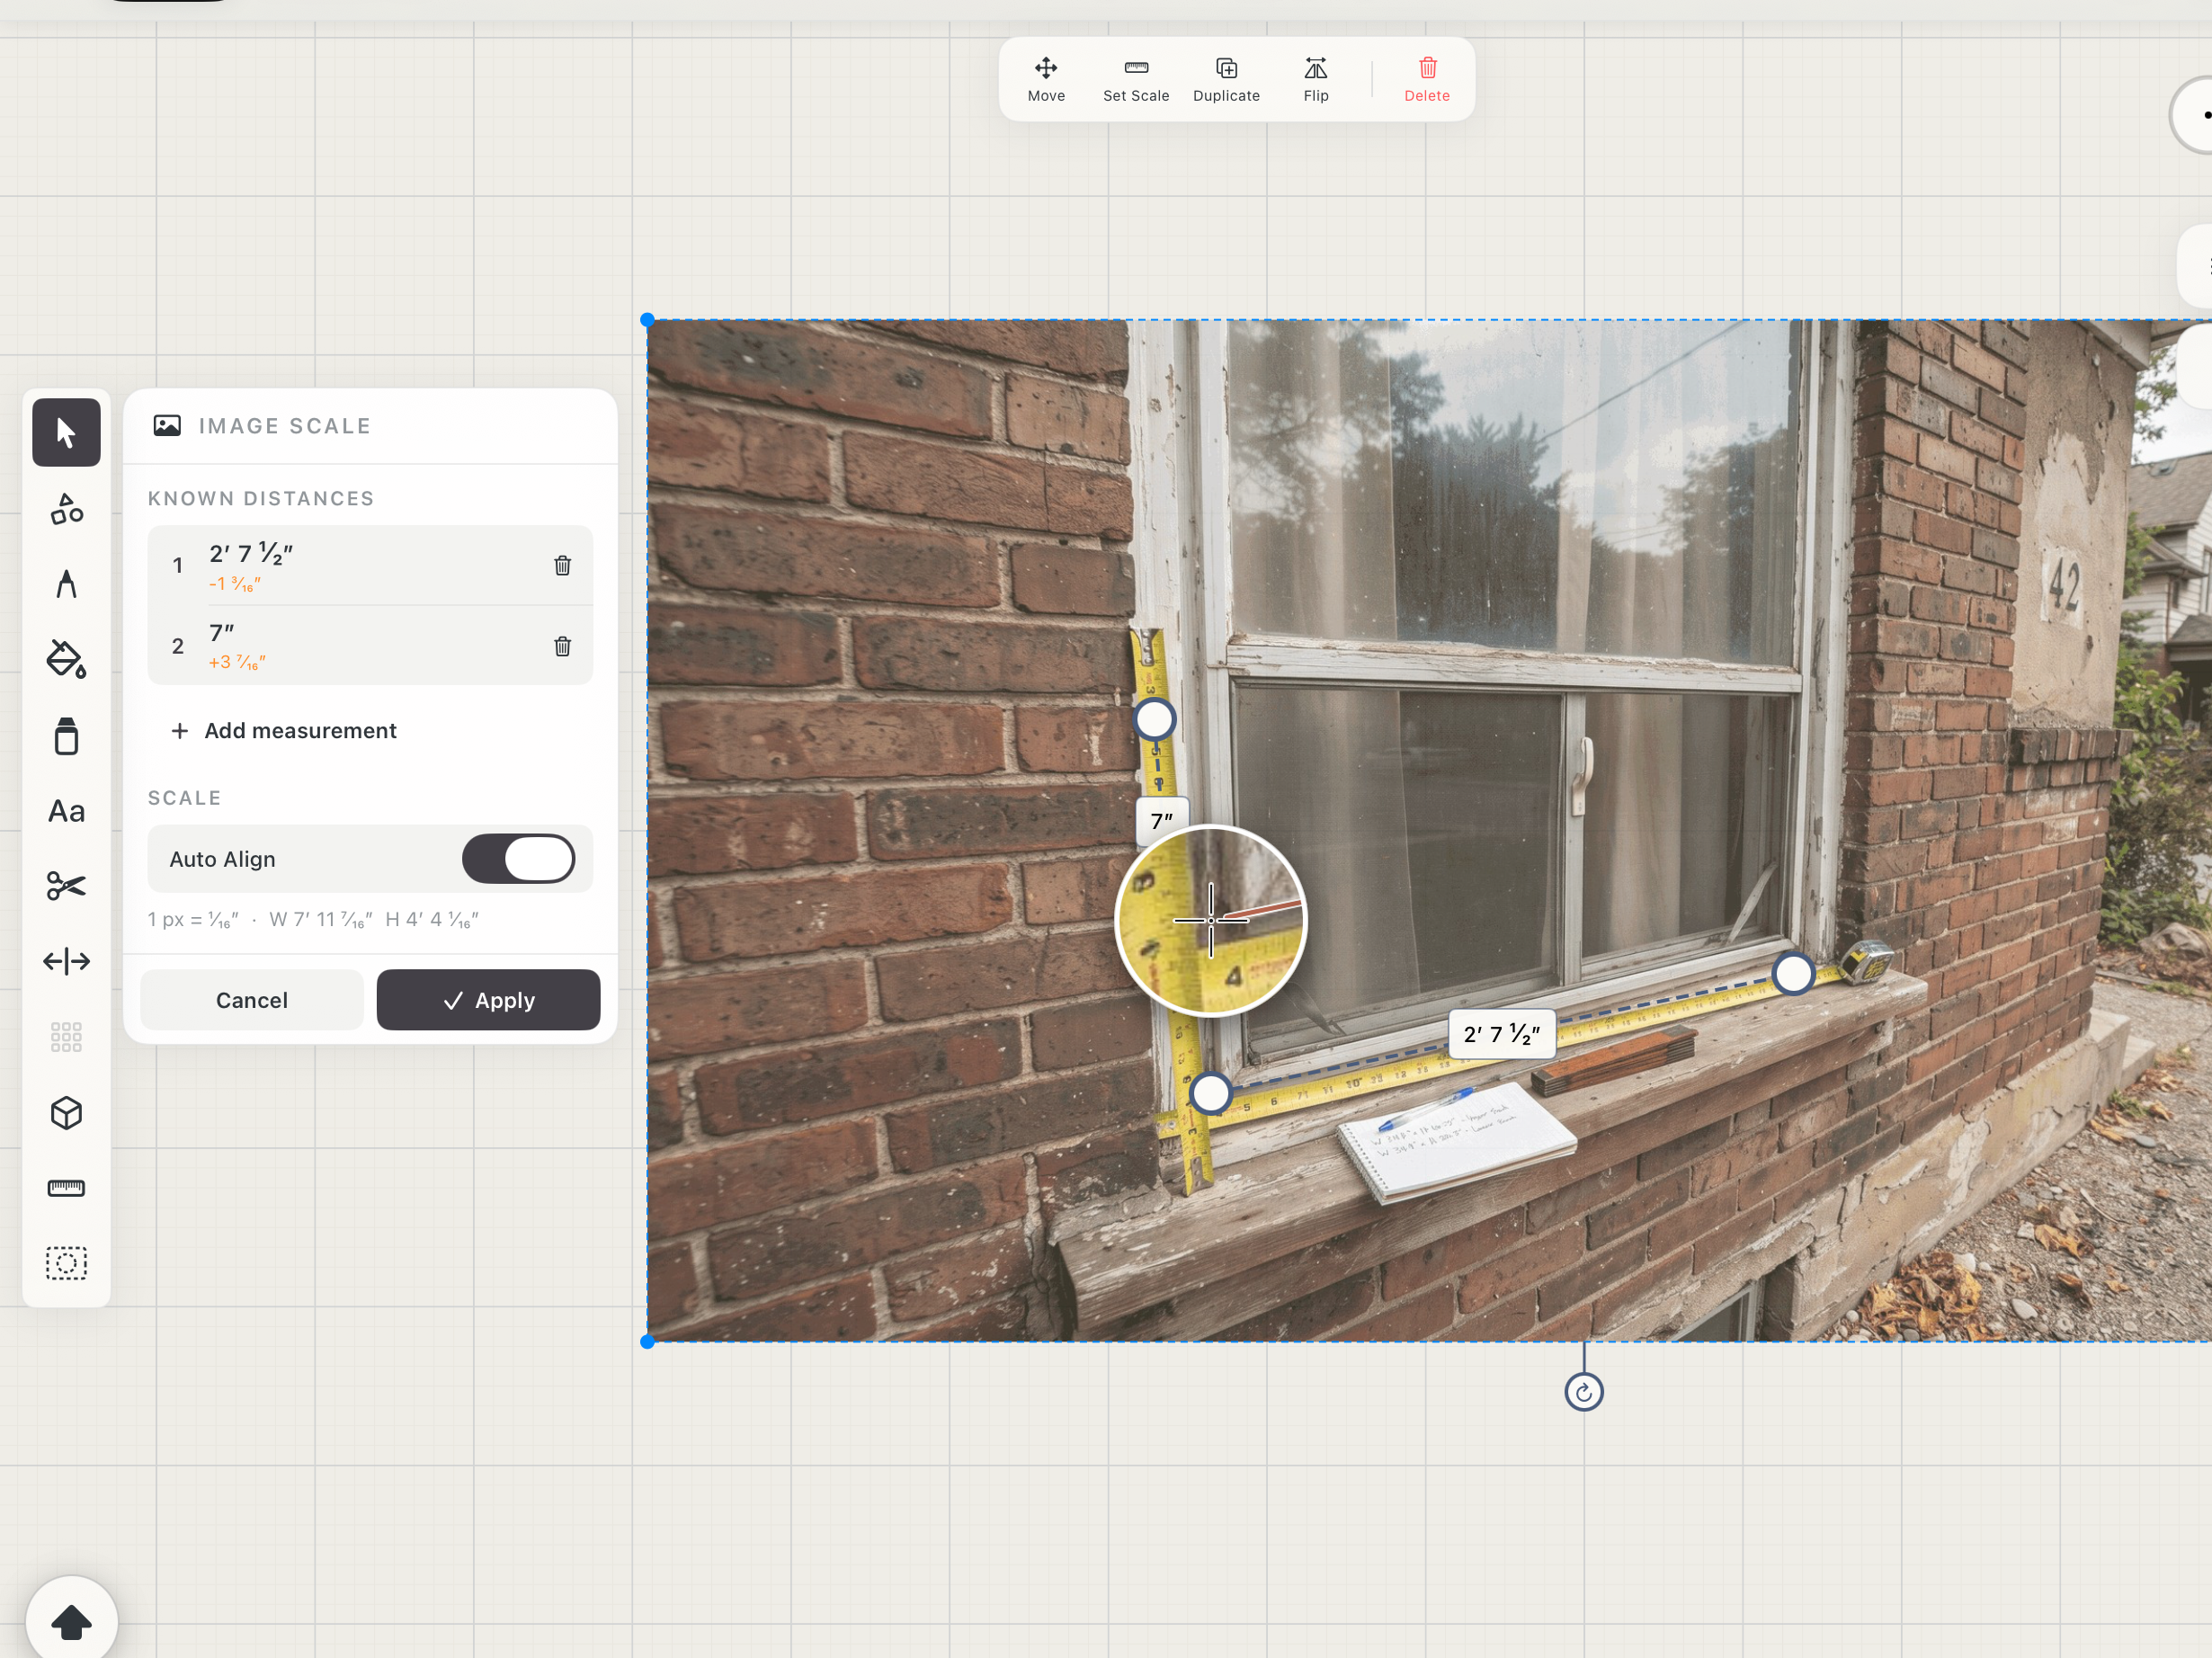 Set Scale under way: two lines on the tapes, the loupe on the end being placed
Drag the ends of each line onto the two points you know the distance between. While you drag, a loupe magnifies what's under your finger, so the end can sit exactly on an edge or a mark. Tap the length on the line itself to type it, just as in the panel.
How to use
- Select the image and tap Set Scale.
- Drag the ends of line 1 onto something you know the length of: a door width, a tape measure in the photo, a sheet of plywood.
- Tap its length and type the real distance.
- Add more lines if you can, the longer the better, and check that none of them turns orange.
- Turn on Auto Align if the image is a little crooked, then tap Apply.
See it in use
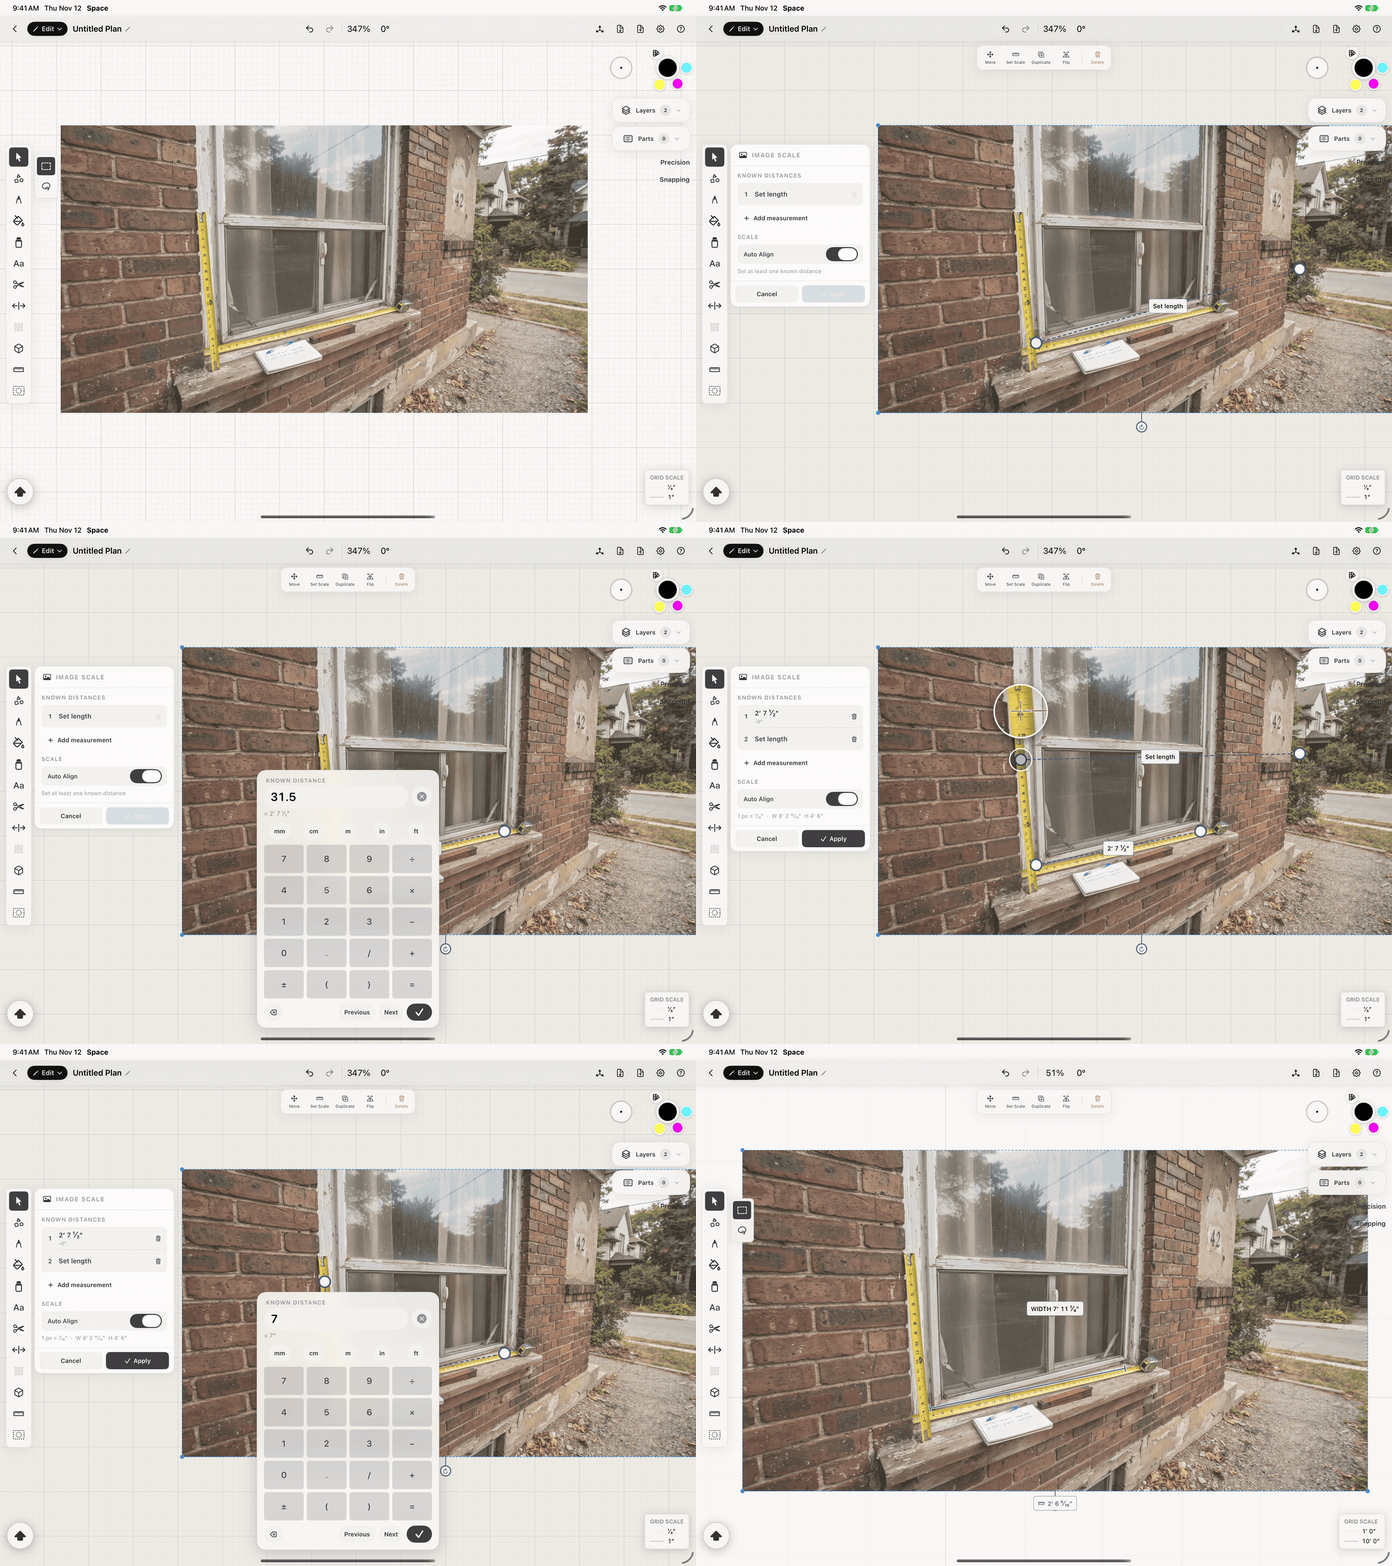
Tips
- Use the longest reliable known distance available; a longer calibration line usually reduces measurement error.
- Measure on the flat face you care about. A photo is only true to scale in the plane the known length lies in.
- Use two perpendicular calibration lines with Auto Align when a scan or photo is slightly rotated.
- Lower the image opacity or hide its layer after tracing to check the finished geometry clearly.